
Knitwear repair steps
My reputation as a knitwear repair whiz brings sweaters, afghans, baby blankets into Melrose’s yarn shop. Always frugal, my heart always prefers repair to replace, but this recent sweater was a challenge. If it weren’t for Scrapiana’s posts on Twitter and Instagram about #TheBigMend, I might have suggested ways to up cycle this designer light as air hooded cardigan.
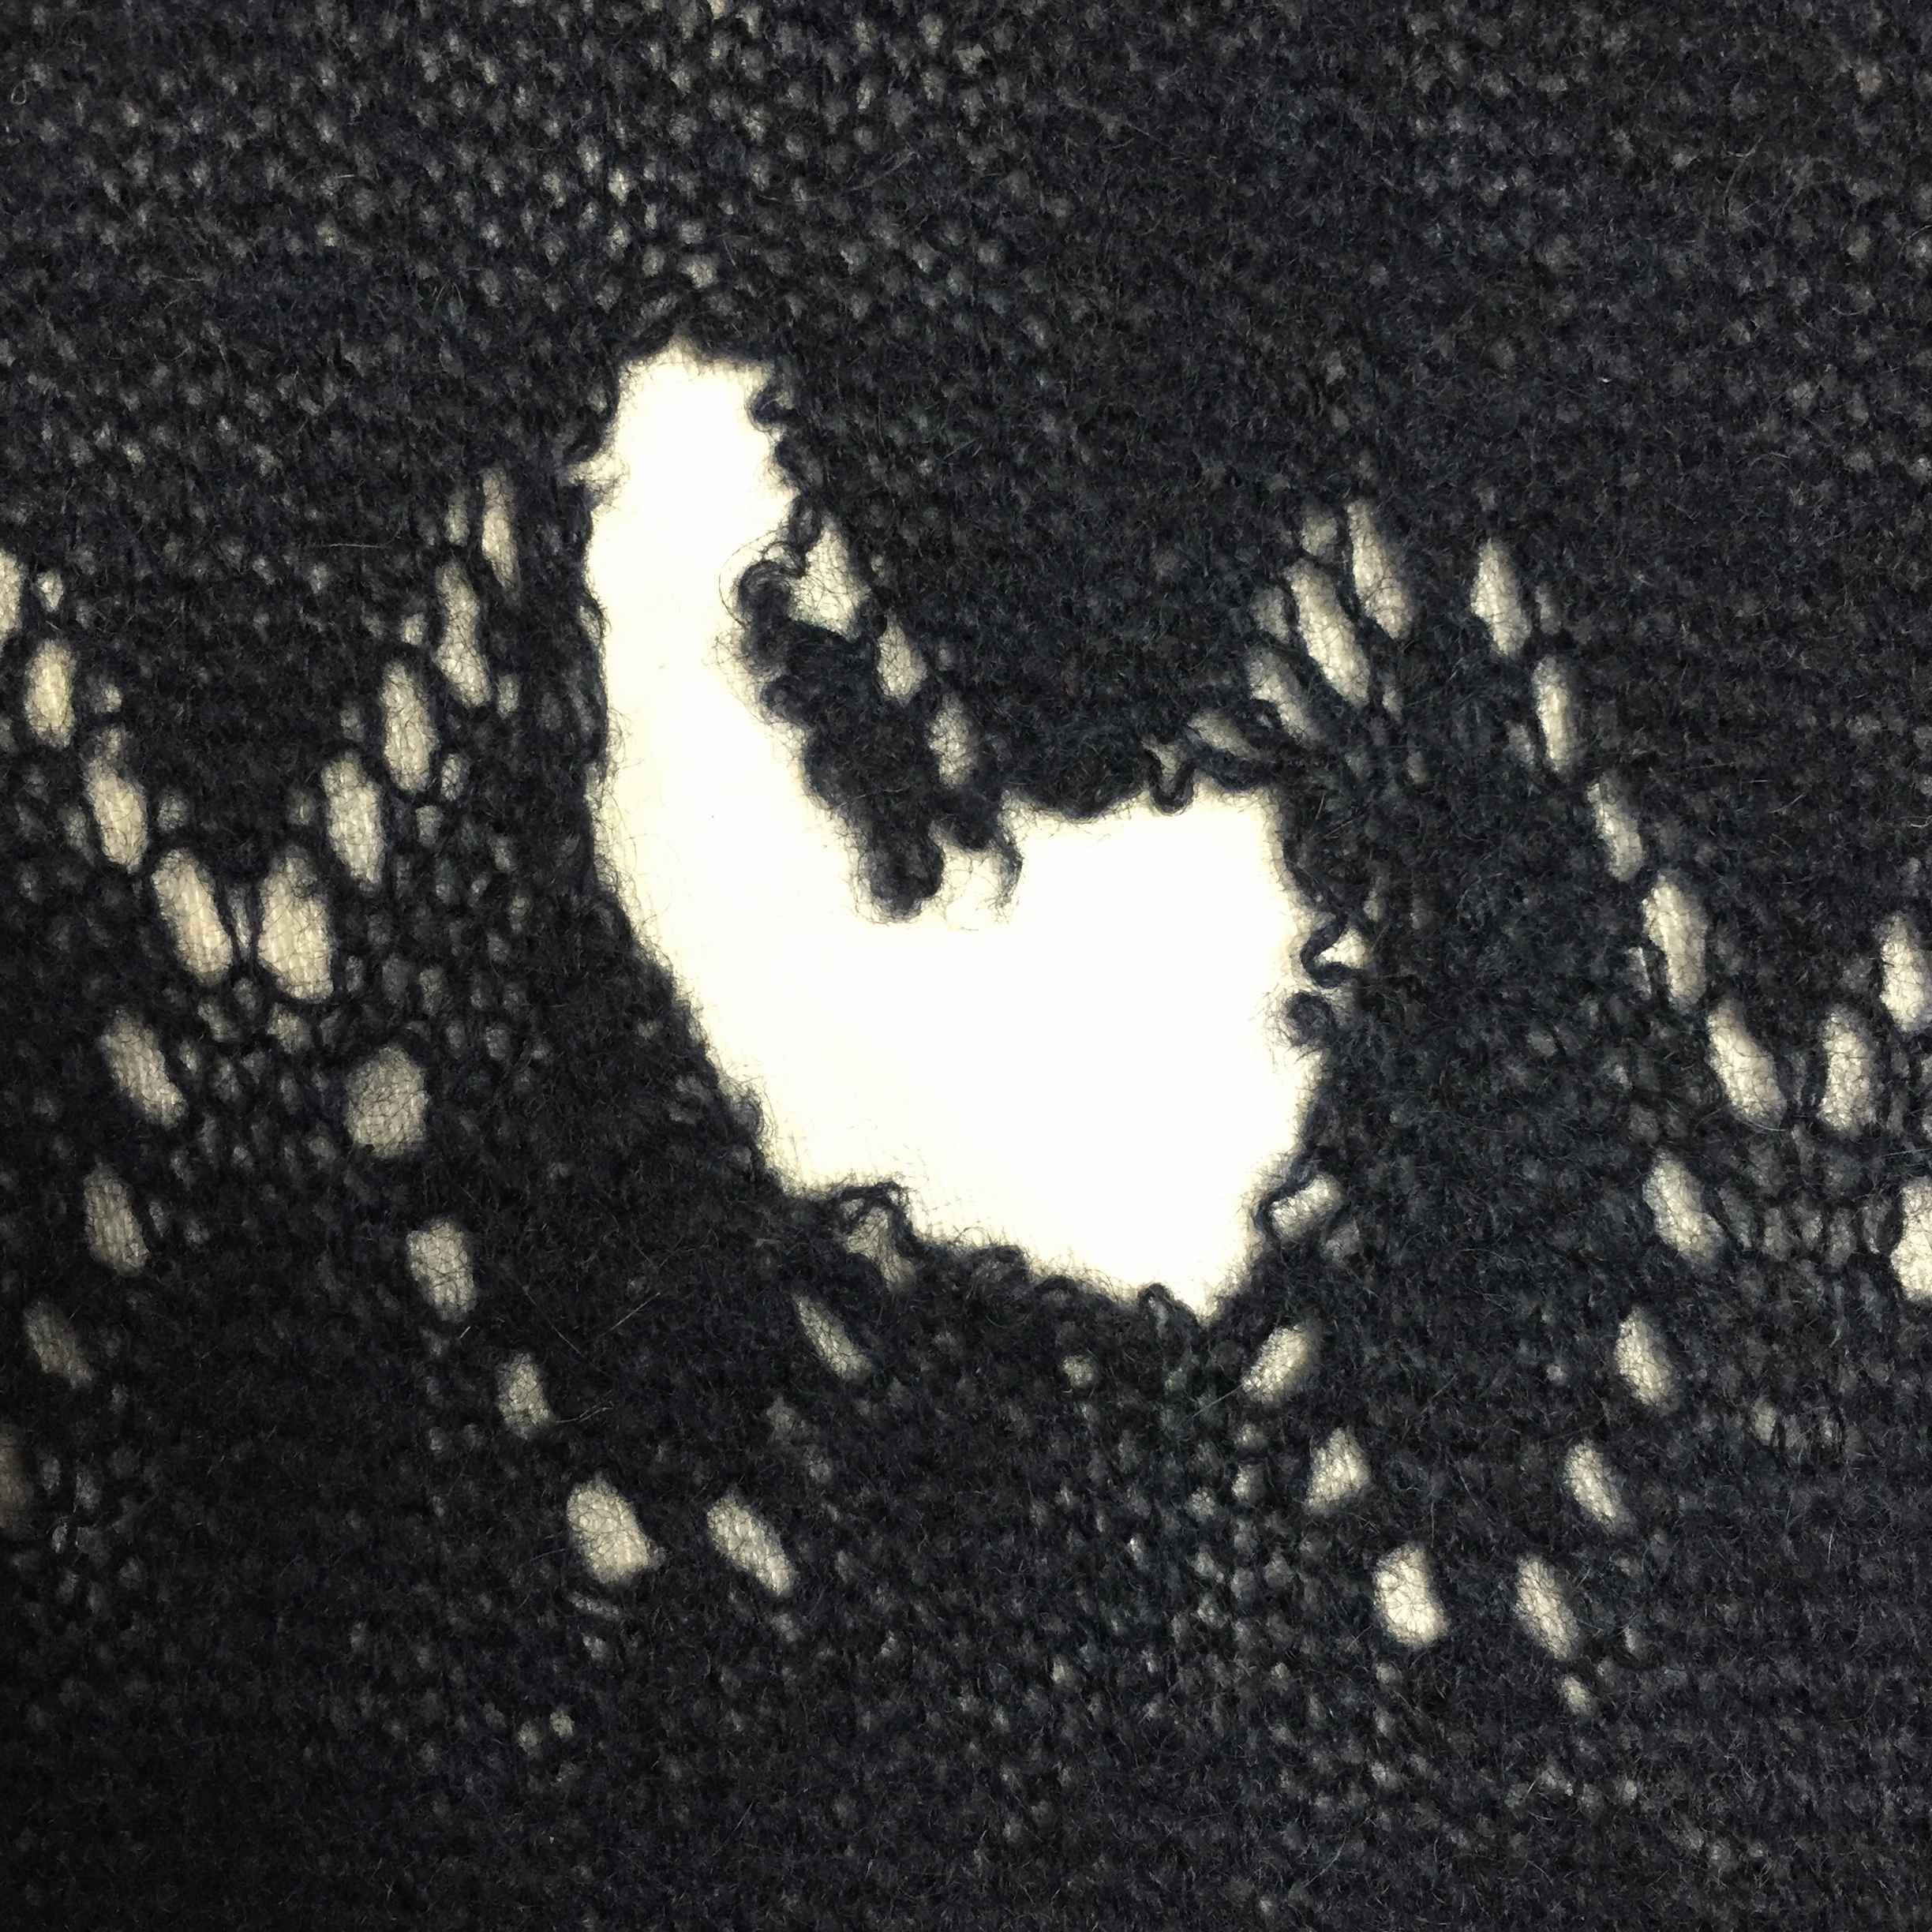
Fine cashmere with nasty rip
With such a large hole, matching the navy cashmere fine yarn was a huge endeavor.
- The first choice is use the mending yarn that came with the sweater. Of course, you can never find that when you need it.
- Second, could I shorten or remove hems to harvest yarn for the repair? Not without many trickle down issues.
- Could we source a similar yarn? The client tried without success and finally, the fine folks at In Stitches suggested that I try embroidery wool. The navy looked quite close, so ahead I went.
Then of course, the real work began:
- Write the lace pattern to match the existing decrease and increase methods.
- Determine the gauge and appropriate needles to obtain the gauge.
- Identify the actual section to reknit.
- For this project, I picked up the bottom row of stitches in the replacement section, joining the rows to the sweater as I worked. Then I grafted the last row of replacement stitches to the cardigan.
- Weave in any ends of the original sweater
- Check the garment for other wear and tear.

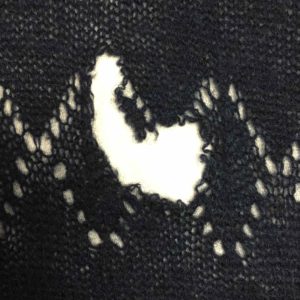
#VisibleMend
In this instance, the mend is visible. That navy embroidery wool looks quite bright next to the original garment (no, it really isn’t a black sweater). It’s mended, whew. It’s not invisible, wah. Can’t perfection always be an option? No, Alanna, not always! A life lesson lurks somewhere in this knitwear repair.
